
Getting started with Dext is quick and straightforward. Whether you're a small business owner, freelancer, bookkeeper, or accountant, setting up your account correctly ensures you can take full advantage of Dext's AI-powered bookkeeping automation.
This guide walks you through the essential steps to create your Dext account and prepare it for daily use.

Step 1: Create Your Dext Account
Visit the official Dext website and choose a plan or start a free trial.
You'll typically need to provide:
- Business name
- Email address
- Password
- Country or region
After registering, verify your email address to activate your account.
Tip: Use your business email for easier collaboration with your accounting team.
Step 2: Complete Your Company Profile
After signing in, update your business information.
Review details such as:
- Company name
- Business address
- Tax information (if applicable)
- Default currency
- Time zone
Accurate company settings help ensure your financial records are processed correctly.
Step 3: Connect Your Accounting Software
One of Dext's biggest advantages is its seamless integration with leading accounting platforms.
Supported integrations include:
- QuickBooks Online
- Xero
- Sage
- FreeAgent
- Zoho Books
Simply select your accounting software, sign in, and authorize the connection.
Once connected, Dext can publish approved transactions directly into your accounting system, reducing duplicate data entry.
Step 4: Configure Bookkeeping Preferences
Before uploading documents, customize your bookkeeping settings.
Depending on your accounting platform, you can configure:
- Expense categories
- Tax rates
- General ledger accounts
- Supplier lists
- Payment methods
These settings help Dext categorize transactions more accurately.
Step 5: Invite Team Members
If multiple people handle bookkeeping, Dext allows you to invite team members with different permission levels.
Common users include:
- Business owners
- Employees
- Finance managers
- Bookkeepers
- Accountants
Role-based access helps protect sensitive financial information while improving collaboration.
Step 6: Set Up Receipt Submission Methods
Choose how you want to send financial documents into Dext.
Available options include:
- Mobile app
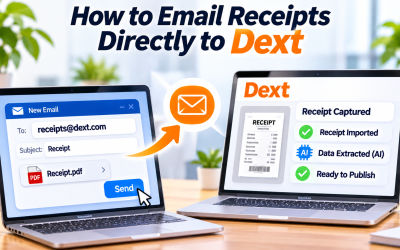
- Email forwarding
- Desktop uploads
- Drag-and-drop files
- Bulk uploads
Most businesses use a combination of methods depending on their workflow.
Step 7: Upload Your First Receipt
Once your account is configured, upload your first receipt or invoice.
Dext's AI immediately extracts important information such as:
- Merchant
- Date
- Amount
- Tax
- Currency
Review the extracted details, approve the transaction, and publish it to your accounting software.
Your bookkeeping automation is now ready to begin.
Best Practices for New Users
To get the most from Dext:
- Upload receipts immediately after purchases.
- Review AI-extracted data before publishing.
- Keep your accounting integration active.
- Regularly update supplier and expense categories.
- Invite your accountant early to improve collaboration.
Following these practices helps maintain accurate and efficient bookkeeping.
Final Thoughts
Setting up a Dext account only takes a few minutes, but doing it correctly can save hours of bookkeeping every month. By connecting your accounting software, configuring bookkeeping preferences, and using Dext's AI-powered automation, you can simplify financial document management from day one.
Whether you're managing your own books or working with an accountant, Dext provides an easy-to-use platform that helps reduce manual work and improve financial accuracy.
Frequently Asked Questions
How long does it take to set up a Dext account?
Most users can complete the initial setup in less than 30 minutes, depending on whether they connect accounting software and customize bookkeeping settings.
Can I use Dext without accounting software?
Yes. You can upload and manage financial documents in Dext without an integration, although connecting accounting software unlocks more automation features.
Can multiple users access one Dext account?
Yes. Dext supports multiple users with customizable roles and permissions, making it ideal for businesses and accounting firms.
What should I do after setting up my account?
After setup, upload your first receipt or invoice, review the AI-extracted data, and publish the transaction to your accounting software to begin automating your bookkeeping.









Write Your Review
No reviews yet. Be the first to share your experience!